Friday, March 2, 2012

Honeycomb Beanie

Materials

  • 250 yds of Worsted Weight Yarn
  • Size US H / 5.00 mm hook

Terminology

BLO
Back Loop Only
BPHDC
Back Post Half Double Crochet
Ch
Chain
DC
Double Crochet
FPHDC
Front Post Half Double Crochet
FPDC
Front Post Double Crochet
HDC
Half Double Crochet
YO
Yarn Over
st(s)
stitch(es)
DC 2 TOG
Double Crochet two Together: YO. Insert hook through stitch and pull up loop. Insert hook through next stitch and pull up loop. YO and pull through three loops on hook. YO and pull through remaining 2 loops on hook.
FPDC 2 FPDC TOG
Front Post Double Crochet two Front Post Double Crochet Together: YO. Insert hook around FPDC in previous row to the right. YO and pull up a loop. YO and pull through two loops on hook. YO. Insert hook through FPDC in previous round to the left. YO and pull up a loop. YO and pull through two loops on hook. YO and pull through remaining 3 loops on hook.

Notes

  • The Ch 2 at the beginning of each round never counts as a stitch.
  • This hat is worked in joined rounds.
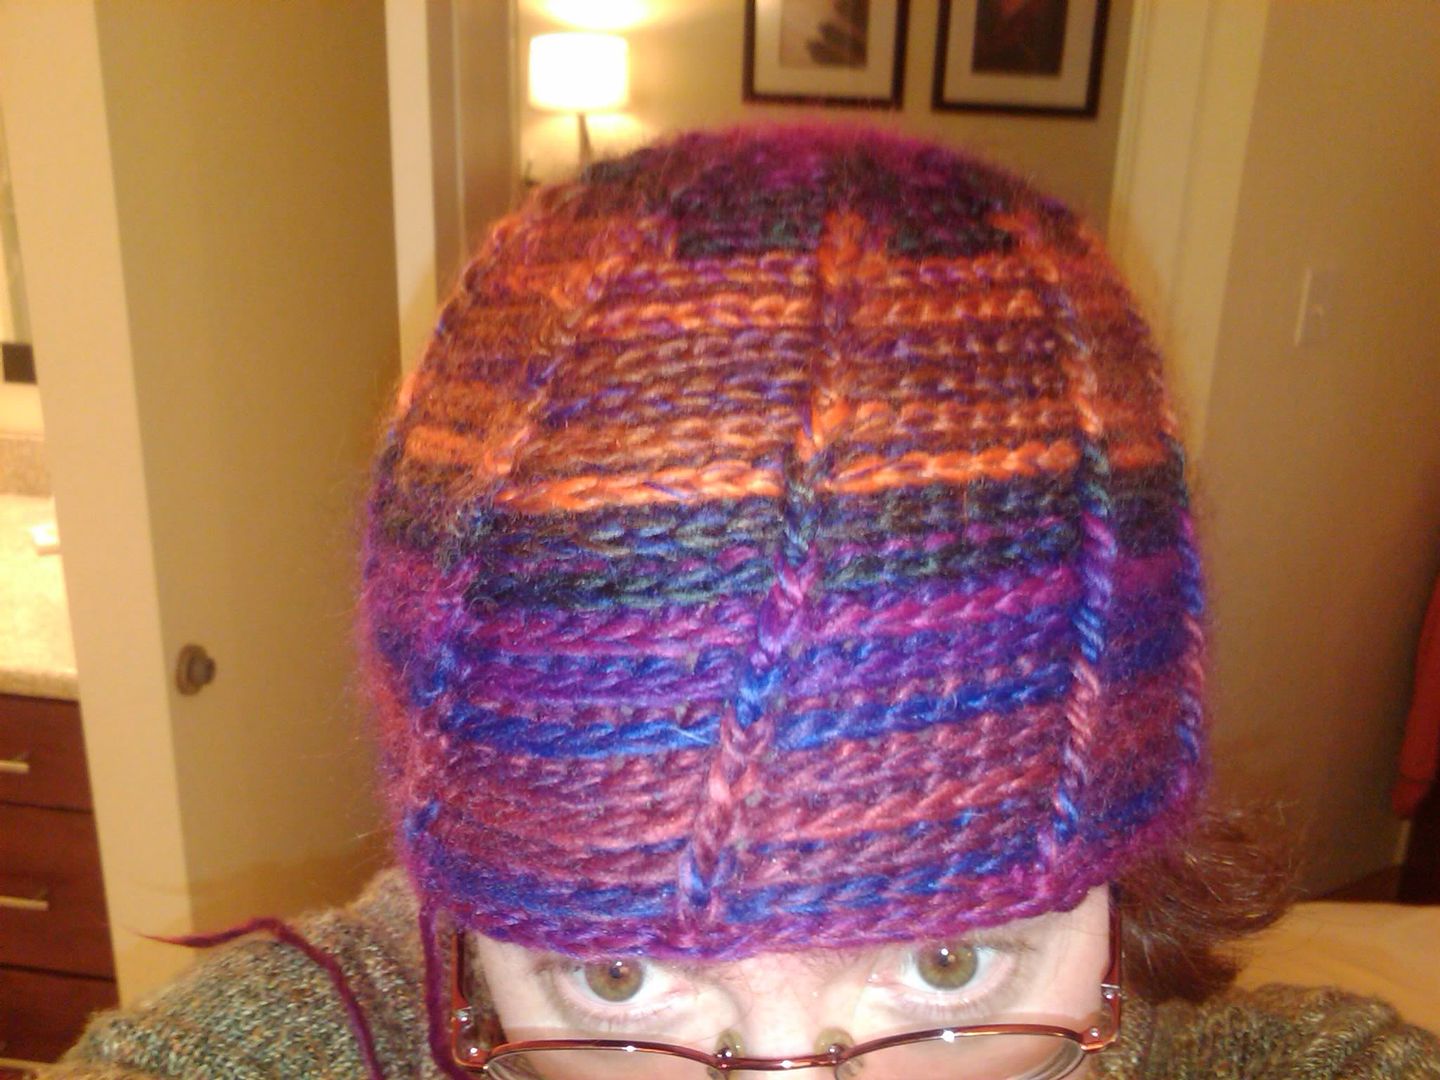
Instructions

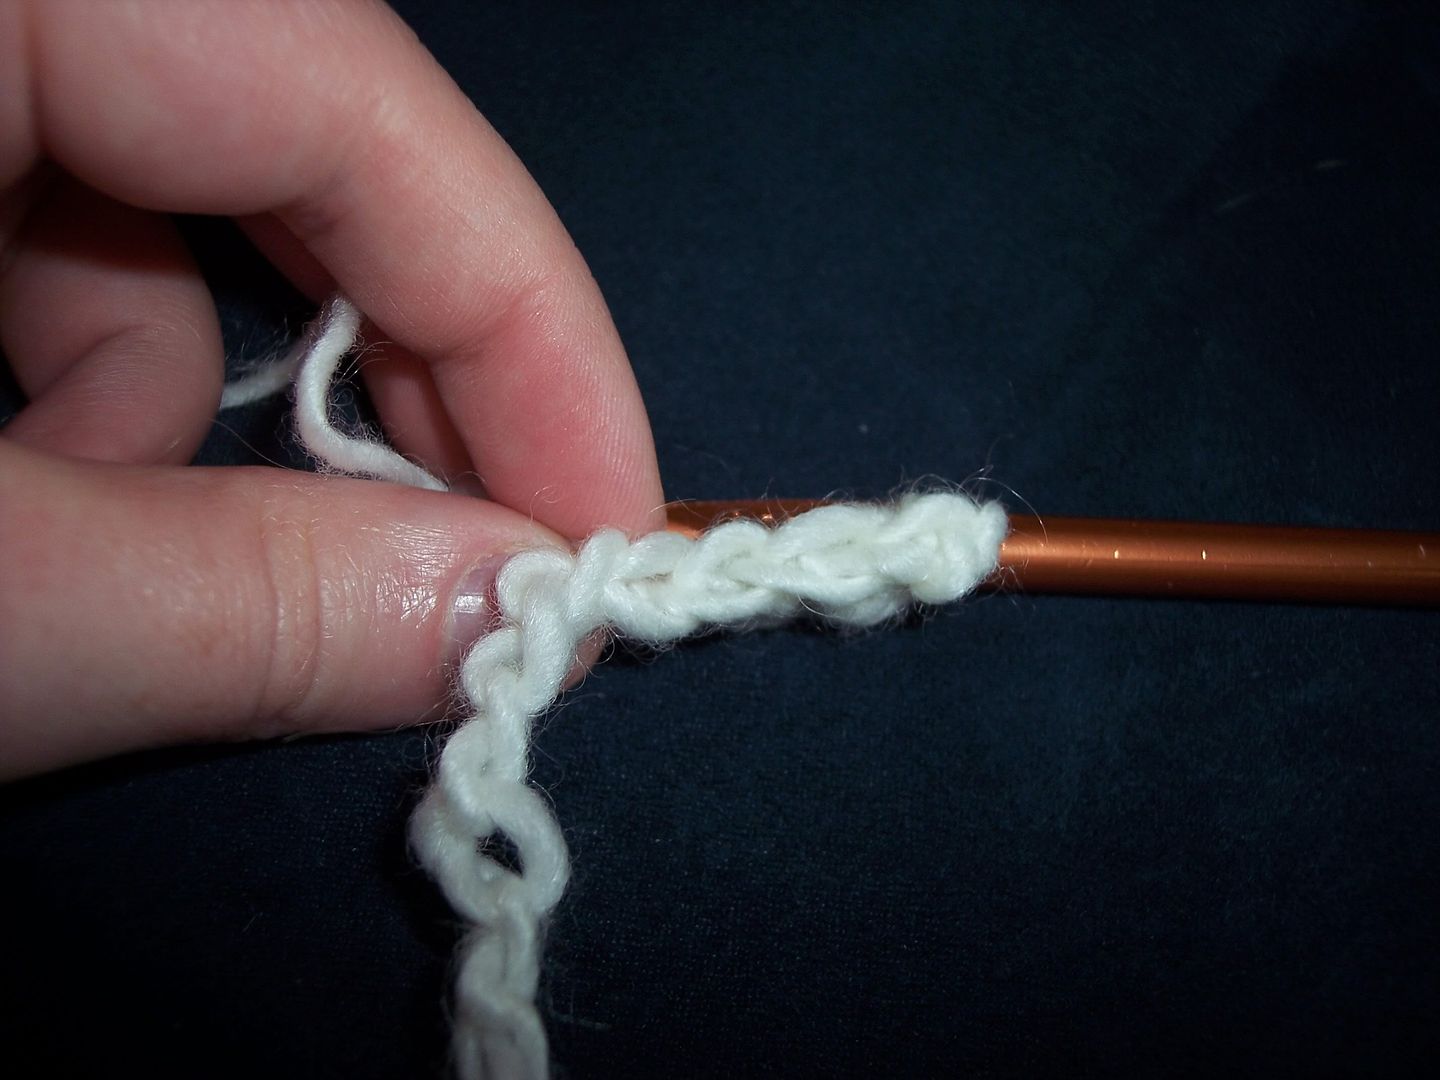
Start: Make a magic loop: wrap the yarn around your fingers twice. Insert the hook through the loop towards the side where the working yarn hangs. YO, and pull up a loop. Ch 2. Do not tighten loop.

R1: 10 DC in loop. Sl st in first DC made. Pull loop tight. (10 sts)

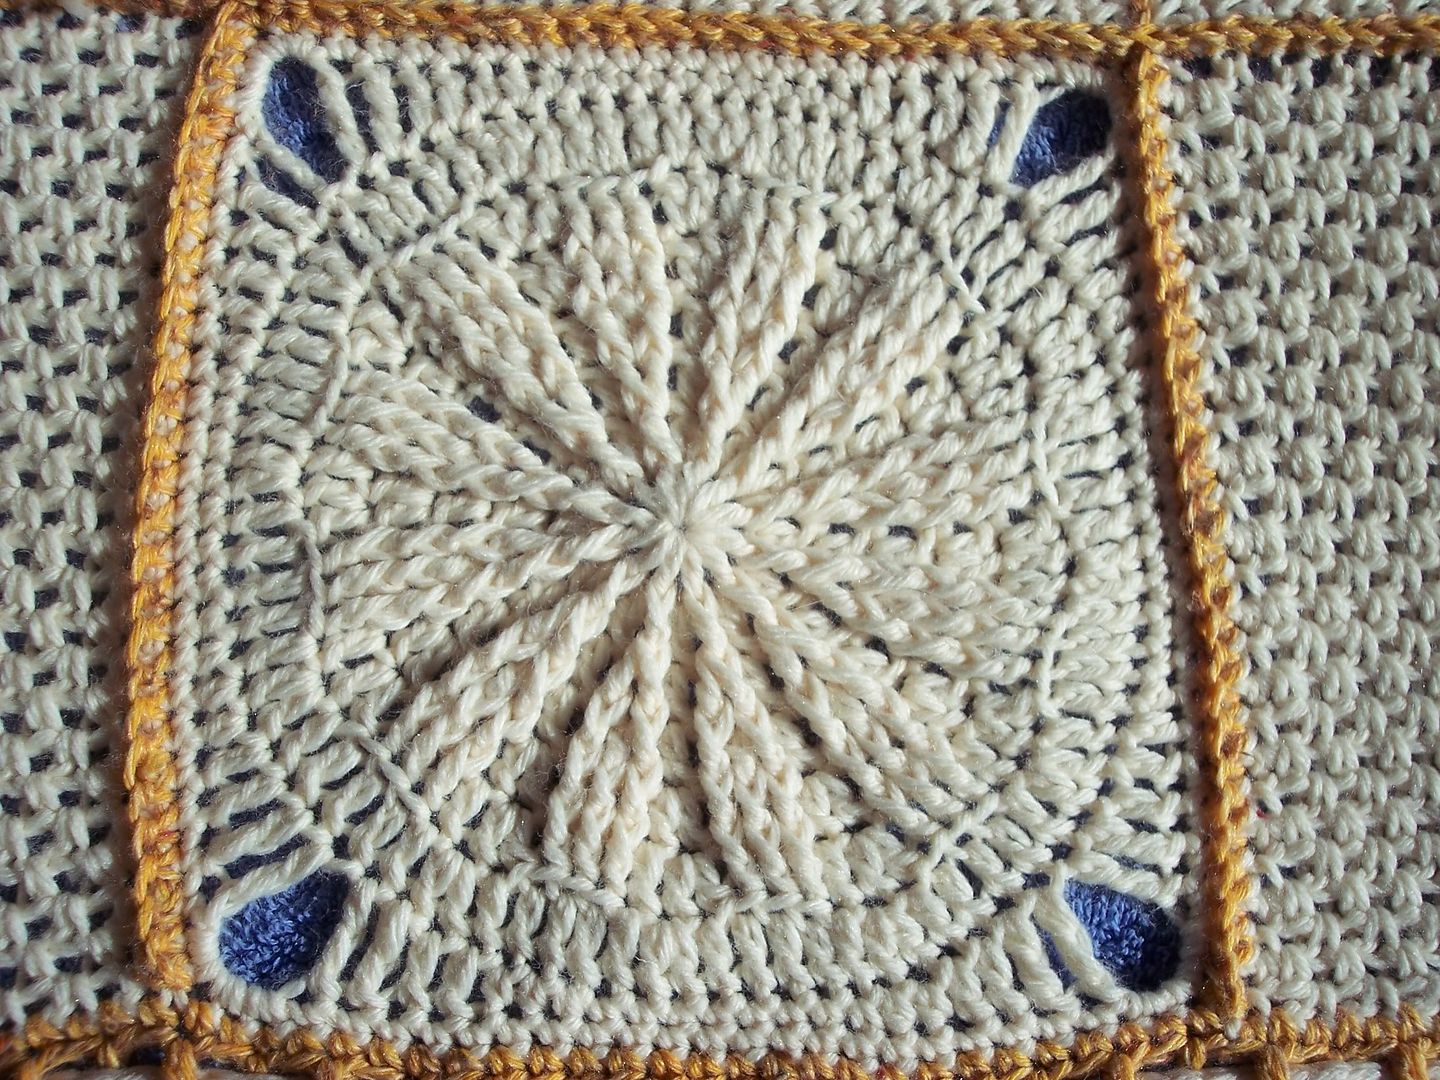
R2: Ch 2. DC & FPDC same st as join. DC & FPDC each st around. Sl st in first DC made. (20 sts)

R3: Ch 2. DC & FPDC same st as join. DC & FPDC each st around. Sl st in first DC made. (40 sts)

R4: Ch 2. 2 DC in same st as join. * FPDC next FPDC. DC next DC. FPDC next FPDC. 2 DC next DC.* Repeat from * to * around ending with FPDC in last FPDC. Sl st in first DC made. (50 sts)

R5: Ch 2. DC in same st as join. *FPDC 2 FPDC TOG. DC in st behind the FPDC 2 FPDC TOG just made. DC in top of FPDC. DC in next st. FPDC 2 FPDC TOG. DC in top of FPDC. DC next st.* Repeat from * to * around ending with a DC in last FPDC. Sl st in first DC made. (70 sts)

R6: Ch 2. 2 DC in same st as join. *FPDC next FPDC 2 FPDC TOG. DC next 3 sts. FPDC next FPDC 2 FPDC TOG. DC next st. 2 DC next st.* Repeat from * to * around ending with a DC in the last st. Sl st in first DC made. (80 sts)

R7: Ch 2. For this round only, the st you joined with from the previous round is crocheted last. FPDC 2 FPDC TOG. * DC st behind FPDC 2 FPDC TOG just made. DC in top of FPDC. DC 2 TOG. FPDC 2 FPDC TOG.* Repeat from * to * around ending with a DC 2 TOG with the last DC made from previous round and the same st as join. Sl st in first FPDC 2 FPDC TOG made. (80 sts)

R8: Ch 2. FPDC same st as join. *DC next 3 sts. FPDC next st.* Repeat from * to * around ending with a DC in the last 3 sts. Sl st in first FPDC made. (80 sts)

R9: Ch 2. DC in same st as join. * DC 2 TOG. FPDC 2 FPDC TOG. DC in st behind FPDC 2 FPDC TOG just made. DC in top of FPDC.* Repeat from * to * around ending on DC in st behind the final FPDC 2 FPDC TOG made. Sl st in first DC made. (80 sts)

R10: Ch 2. DC same st as join. DC next st. *FPDC next st. DC next 3 sts.* Repeat from * to * around ending with a DC in the last st. Sl st in first DC made. (80 sts)

R11+: Repeat R7 through R10 until hat reaches desired length (long enough to sit on or just above your eyebrows.) End on R7 or R9 before proceeding to Brim.
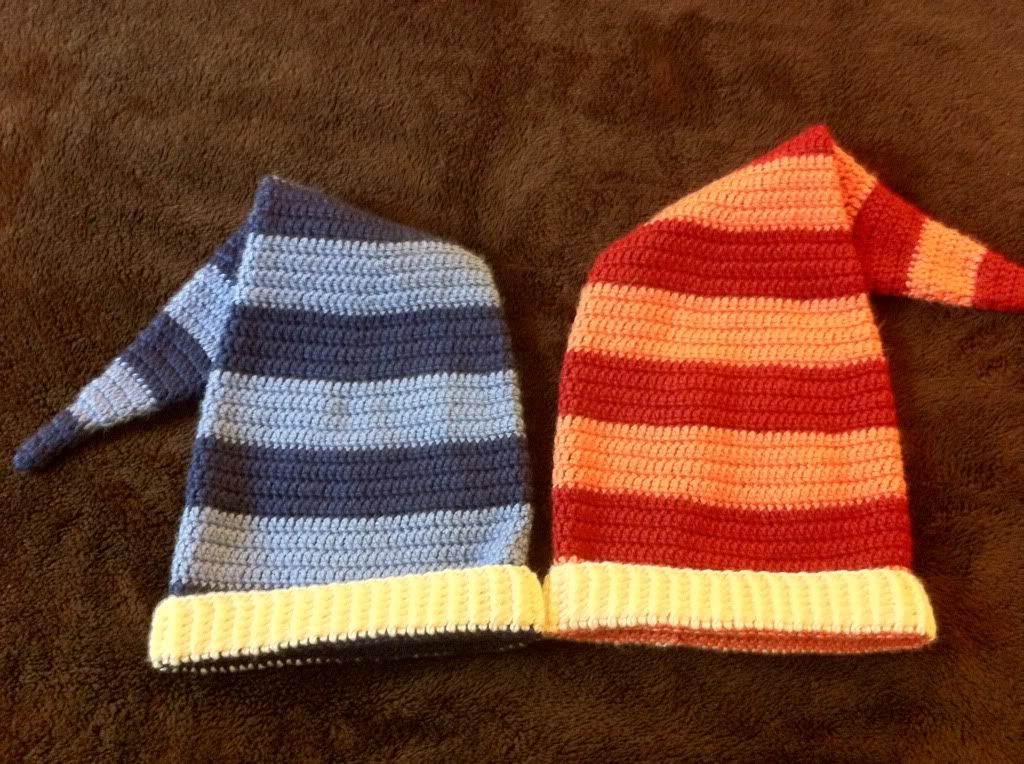
Brim

R1: Ch 2. HDC through BLO around. Sl st in first HDC made. (80 sts)

R2: Ch 2. FPHDC same sts as join and Ch 2 below. *BPHDC next sts. FPHDC next st.* Repeat from * to * around, ending on BPHDC. Sl st in first FPHDC made. (80 sts)

R3: Ch 2. FPHDC same sts as join and Ch 2 below. *BPHDC next BPHDC. FPHDC next FPHDC.* Repeat from * to * around, ending on BPHDC. Sl st in first FPHDC made. (80 sts)

R4+: Repeat R3 until brim is 1.5 inches wide. Proceed to edging.


Edging: Ch 1. Crab stitch in last stitch made in previous round: insert hook through stitch to the right (crochet backwards) of current position. YO and pull up a loop. YO and pull through all loops on hook. The end result is a twisted single crochet. Crab stitch around. Sl st in first crab stitch made. Finish off. (80 sts)


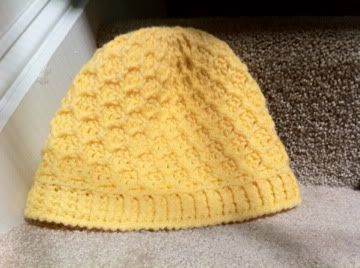
Honeycomb Beanie by Sarah Mitchell is licensed under a Creative Commons Attribution 3.0 United States License.

Fall Hat

Suggested yarn: 2 balls of Classic Shades in Tropics. I only used 1 ball and avoided breaking into the second ball by making a very very very short "brim". However, had I gone with a longer brim or hat, I would have needed 2 balls of yarn. This is why I suggest 2 balls of Classic Shades.

Suggested substitute yarns:

  • 2 balls Plymouth Yarn's Encore Worsted or Encore Colorspun Worsted
  • 1 ball Loops & Threads Impeccable Solids or 2 balls Impeccable Ombre
Hook: US H/5.00 mm

Terminology: This pattern is written in US crochet terms. If you want UK teminology, please comment! I am more than happy to convert the pattern for you.

  • magic adjustable loop - wrap the yarn around two fingers twice, creating a loop. To crochet in the loop, you want to insert the hook from the side where the tail end of the loop hangs to the other side where your working yarn hangs. Pull through one loop and proceed with pattern's instructions.
  • ch - chain
  • dc - double crochet
  • sl st - slip stitch
  • fpdc - front post double crochet
  • bpdc - back post double crochet
  • bphdc - back post half double crochet (like a bpdc, except it's a half double crochet)

Start: Create magic adjustable loop. Ch 2. 10 dc in loop. Sl St in first dc made. Ch 2 never counts as a stitch.

R1: Ch 2. Fpdc around dc you sl st into AND ch 2 in "Start" round below. Dc in same dc. fpdc and dc in each dc around. Sl st in top of first fpdc made. 10 fpdc & 10 dc made. 20 sts total.

R2: Ch 2. Fpdc around first fpdc AND ch 2 made in previous round. Dc in same fpdc you just fpdc around. Bpdc next dc. *fpdc and dc in next fpdc; bpdc next dc* repeat from * to * around. Join with sl st in top of first fpdc made. 10 fpdc, 10 dc, & 10 bpdc made. 30 sts total.

R3: Ch 2. Fpdc around first fpdc AND ch 2 made in previous round. Dc in same fpdc you just fpdc around. Bpdc next 2 sts. *fpdc and dc next fpdc; bpdc next 2 sts* repeat from * to * around. Join with sl st in top of first fpdc made. 10 fpdc, 10 dc, & 20 bpdc made. 40 sts total.

R4: Ch 2. Fpdc around first fpdc AND ch 2 made in previous round. Dc in same fpdc you just fpdc around. Bpdc next 3 sts. *fpdc and dc in next fpdc; bpdc next 3 sts* repeat from * to * around. Join with sl st in top of first fpdc made. 10 fpdc, 10 dc, & 30 bpdc made. 50 sts total.

R5: Ch 2. Fpdc around first fpdc AND ch 2 made in previous round. Dc in same fpdc you just fpdc around. Bpdc next 4 sts. *fpdc and dc in next fpdc; bpdc next 4 sts* repeat from * to * around. Join with sl st in top of first fpdc made. 10 fpdc, 10 dc, & 40 bpdc made. 60 sts total.

R6: Ch 2. Fpdc around first fpdc AND ch 2 made in previous round. Dc in same fpdc you just fpdc around. Bpdc next 5 sts. *fpdc and dc in next fpdc; bpdc next 5 sts* repeat from * to * around. Join with sl st in top of first fpdc made. 10 fpdc, 10 dc, & 50 bpdc made. 70 sts total.

R7: Ch 2. Fpdc around first fpdc AND ch 2 made in previous round. Bpdc next 6 sts. *fpdc in fpdc; bpdc next 6 sts* repeat from * to * around. Join with sl st in top of first fpdc made. 10 fpdc & 60 bpdc made. 70 sts total.

R8: Ch 2. Fpdc around first fpdc AND ch 2 made in previous round. Bpdc around next 6 bpdc. *Fpdc next fpdc. Bpdc next 6 bpdc* repeat from * to * around. Join with sl st in top of first fpdc made. 70 sts total each round.

Repeat R8 until desired length -- I suggest periodically trying the hat on to decide if it's long enough and to placate your worries about the hat being too small. Keep in mind that back post double crochet curls inward (as in, towards the inside of your hat.) This results in the hat looking smaller than it actually is. But Don't Panic! The fabric is quite stretchy and will expand to contain your enormous cranium made huge by your awesome intellect.

I repeated R8 13 times (so, I crocheted 21 rounds before finishing.) My stitches tend to be short --- I always find myself making more rows in things like baby sweaters. Don't be surprised if you need less or more rounds.

To Finish: Ch 1. Bphdc around fpdc AND ch 2 in round below. Bphdc around each st. Sl st into first bphdc. 70 bphdc made. 70 sts total.

You're Done!

Pinwheel Motif

This motif is worked in joined rounds. There is a glossary of terms and links to additional resources at the end. Pattern written in American English.

Pattern

Start: Make a Magic Adjustable Ring by wrapping the yarn around your fingers twice and then chaining once. Don't tighten the loop. Keep it loose as you work until the end of the first round.

R1: Ch 3 (counts as first dc.) 11 dc in ring. Sl st in 3rd ch of ch 3. Pull center tight. 12 dc made.

R2: Ch 3 (counts as first dc.) Fpdc around ch 3 from round below. *1 dc, 1 fpdc around next dc* repeat from * to * 11 times. Sl st in 3rd ch of ch 3. 12 dc and 12 fpdc made.

R3: Ch 3 (counts as first dc.) 2 fpdc around fpdc in round below. *dc next dc. 2 fpdc around next fpdc* repeat from * to * 11 times. Sl st in 3rd ch of ch 3. 12 dc and 24 fpdc made.

R4: Ch 3 (counts as first dc.) Fpdc next fpdc. 1 dc and 1 fpdc in next fpdc . * dc next dc; fpdc next fpdc; 1 dc and 1 fpdc in next fpdc* repeat from * to * 11 times. Sl st in 3rd ch of ch 3. 24 dc and 24 fpdc made.

R5: Ch 3 (counts as first dc.) 1 dc in same stitch as ch 3. Fpdc next fpdc. Fpdc next dc. Fpdc next fpdc. *2 dc in next dc; fpdc next fpdc; fpdc next dc; fpdc next fpdc* repeat from * to * 11 times. Sl st in 3rd ch of ch 3. 24 dc and 36 fpdc made.

R6: Ch 3 (counts as first dc.) 2 dc in next dc. Fpdc in next 3 fpdc. * Dc next dc; 2 dc in next dc; fpdc in next 3 fpdc* repeat from * to * 11 times. 36 dc and 36 fpdc made.

R7: Ch 3 (counts as first dc.) 2 dc in next dc. Dc next dc. Dc in BLO in each of next 3 fpdc. *dc next dc; 2 dc next dc; dc next dc; dc in BLO in each of next 3 fpdc* repeat from * to * 11 times. 84 dc made.

R8: Ch 4 (counts as first tr.) 1 tr in next dc. Dc next 2 st. Hdc next 2 st. Sc next 9 st. Hdc next 2 st. Dc next 2 st. Tr next 2 st. Ch 3. *Tr next 2 st. Dc next 2 st. Hdc next 2 st. Sc next 9 st. Hdc next 2 st. Dc next 2 st. Tr next 2 st. Ch 3.* repeat from * to * 3 times. Sl St in 4th ch of ch 4.

R9: Ch 1 (does NOT count as sc). Sc same st as ch 1. Sc next 20 st. 5 sc in ch 3 space. *Sc next 21 st. 5 sc in ch 3 space.* repeat * to * 3 times.

Fasten off.

Appendix

You will find terminology and additional resources in this section.

Terminology

sl st
Slip Stitch
ch
Chain
BLO
Back Loop Only
dc
Double Crochet
hdc
Half Double Crochet
tr
Treble Crochet
fpdc
Front Post Double Crochet
st
stitch

Resources

Magic Adjustable Ring
The Magic Adjustable Ring: A Better Way to Begin Crochet in the Round
Front Post Double Crochet
How to make a Front Post Double Crochet
Additional Resources
NextStitch.com: videos on everything

Creative Commons License
Pinwheel Motif by Sarah Mitchell is licensed under a Creative Commons Attribution 3.0 United States License.

Pointed Hats

I made pointy hats this Christmas season from my brain. This pattern is involved, but simple. I think anyone can make it. But it's got a LOT of instructions.

Supplies

  • Caron Simply Soft, 6 oz:
    • Blue Hat: 1 ball DK Country Blue (MC); 1 ball Blueberry (CC)
    • Red Hat: 1 ball Persimmon (MC); 1 ball Autumn Red (CC)
    • Both Hats: 1 ball Off White (White)
  • 5.00 mm/US H Hook

Terminology

This pattern is written using US English Crochet terms. Translations available upon request. Put requests in the comments section.

  • MC - Main Color
  • CC - Contrasting Color
  • ch - chain
  • dc - double crochet
  • hdc - half double crochet
  • fphdc - front post half double crochet
  • bphdc - back post half double crochet
  • sts - stitches

Notes

  • This hat is worked from the pointy tip to the brim
  • Color changes every 4 rounds
  • Hat is worked in joined rounds
  • Ch 2 at the beginning of a round NEVER counts as a stitch
  • Always put the first dc, hdc, or fphdc in the same stitch as you joined in from the previous round
  • If you plan on adding a tassel or pompom to the tip of the hat, leave yourself a 12" tail when starting the hat so you can attach the dangly awesomeness

Pattern

R1: Using MC, Start with an adjustable loop. Ch 2. 4 dc in loop. Join with first dc. (4 sts)

R2: Ch 2. 2 dc in same dc as join, dc next dc. 2 dc next dc, dc next dc. Join with first dc. (6 sts)

R3: Ch 2. Dc in each dc. Join with first dc. (6 sts)

R4: Ch 2. 2 dc in same dc as join, dc next 2 dc. 2 dc in next, dc next 2 dc. Join with first dc. (8 sts)

Switch to CC

R5: Ch 2. Dc in each dc. Join with first dc. (8 sts)

R6: Ch 2. 2 dc in same dc as join, dc next dc. *2 dc next dc, dc next dc* repeat from * to * around. Join with first dc. (12 sts)

R7: Ch 2. Dc in each dc. Join with first dc. (12 sts)

R8: Ch 2. 2 dc in same dc as join, dc next 2 dc. *2 dc next dc, dc next 2 dc* repeat from * to * around. Join with first dc. (16 sts)

Switch to MC

R9: Ch 2. Dc in each dc. Join with first dc. (16 sts)

R10: Ch 2. 2 dc in same dc as join, dc next 3 dc. *2 dc next dc, dc next 3 dc* repeat from * to * around. Join with first dc. (20 sts)

R11: Ch 2. Dc in each dc. Join with first dc. (20 sts)

R12: Ch 2. 2 dc in same dc as join, dc next 4 dc. *2 dc next dc, dc next 4 dc* repeat from * to * around. Join with first dc. (24 sts)

Switch to CC

R13: Ch 2. Dc in each dc. Join with first dc. (24 sts)

R14: Ch 2. 2 dc in same dc as join, dc next 5 dc. *2 dc next dc, dc next 5 dc* repeat from * to * around. Join with first dc. (28 sts)

R15: Ch 2. Dc in each dc. Join with first dc. (28 sts)

R16: Ch 2. 2 dc in same dc as join, dc next 6 dc. *2 dc next dc, dc next 6 dc* repeat from * to * around. Join with first dc. (32 sts)

Switch to MC

R17: Ch 2. Dc in each dc. Join with first dc. (32 sts)

R18: Ch 2. 2 dc in same dc as join, dc next 7 dc. *2 dc next dc, dc next 7 dc* repeat from * to * around. Join with first dc. (36 sts)

R19: Ch 2. Dc in each dc. Join with first dc. (36 sts)

R20: Ch 2. 2 dc in same dc as join, dc next 8 dc. *2 dc next dc, dc next 8 dc* repeat from * to * around. Join with first dc. (40 sts)

Switch to CC

R21: Ch 2. Dc in each dc. Join with first dc. (40 sts)

R22: Ch 2. 2 dc in same dc as join, dc next 9 dc. *2 dc next dc, dc next 9 dc* repeat from * to * around. Join with first dc. (44 sts)

R23: Ch 2. Dc in each dc. Join with first dc. (44 sts)

R24: Ch 2. 2 dc in same dc as join, dc next 10 dc. *2 dc next dc, dc next 10 dc* repeat from * to * around. Join with first dc. (48 sts)

Switch to MC

R25: Ch 2. Dc in each dc. Join with first dc. (48 sts)

R26: Ch 2. 2 dc in same dc as join, dc next 11 dc. *2 dc next dc, dc next 11 dc* repeat from * to * around. Join with first dc. (52 sts)

R27: Ch 2. Dc in each dc. Join with first dc. (52 sts)

R28: Ch 2. 2 dc in same dc as join, dc next 12 dc. *2 dc next dc, dc next 12 dc* repeat from * to * around. Join with first dc. (56 sts)

Switch to CC

R29: Ch 2. Dc in each dc. Join with first dc. (56 sts)

R30: Ch 2. 2 dc in same dc as join, dc next 13 dc. *2 dc next dc, dc next 13 dc* repeat from * to * around. Join with first dc. (60 sts)

R31: Ch 2. Dc in each dc. Join with first dc. (60 sts)

R32: Ch 2. 2 dc in same dc as join, dc next 14 dc. *2 dc next dc, dc next 14 dc* repeat from * to * around. Join with first dc. (64 sts)

Switch to MC

R33: Ch 2. Dc in each dc. Join with first dc. (64 sts)

R34: Ch 2. 2 dc in same dc as join, dc next 15 dc. *2 dc next dc, dc next 15 dc* repeat from * to * around. Join with first dc. (68 sts)

R35: Ch 2. Dc in each dc. Join with first dc. (68 sts)

R36: Ch 2. 2 dc in same dc as join, dc next 16 dc. *2 dc next dc, dc next 16 dc* repeat from * to * around. Join with first dc. (72 sts)

Switch to CC

R37: Ch 2. Dc in each dc. Join with first dc. (72 sts)

R38: Ch 2. 2 dc in same dc as join, dc next 17 dc. *2 dc next dc, dc next 17 dc* repeat from * to * around. Join with first dc. (76 sts)

R39: Ch 2. Dc in each dc. Join with first dc. (76 sts)

R40: Ch 2. 2 dc in same dc as join, dc next 18 dc. *2 dc next dc, dc next 18 dc* repeat from * to * around. Join with first dc. (80 sts)

Switch to MC

R41 - R54: Ch 2. Dc in each dc. Join with first dc. (80 sts)

Switch to CC

R45 - R48: Ch 2. Dc in each dc. Join with first dc. (80 sts)

Switch to MC

R49 - R52: Ch 2. Dc in each dc. Join with first dc. (80 sts)

Switch to White

R53: Ch 1. Hdc in each dc. Join with first hdc. (80 sts)

R54: Ch 1. Fphdc same stitch. Bphdc next stitch. Alternate fphdc and bphdc around. Join with first fphdc. (80 sts)

R55 - R58: Ch 1. Fphdc in each fphdc. Bphdc in each bphdc. Join with first fphdc. (80 sts)

Fasten off at end of R58.

Finishing

Weave in all ends. Optionally, you can attach a pompom or tassel or crocheted star, sphere, or zombie to the tip of the hat.

Creative Commons License
Pointed Hat by Sarah Mitchell is licensed under a Creative Commons Attribution 3.0 United States License. Feel free to do whatever you want with this one EXCEPT copy the pattern word for word and publish it in a book for your own profit. If it's free for you, it's free for everyone.

iFelt iPad Case

A felted case designed for an iPad or device/book of similar size.

Gauge

18 sc x 18 rows = 6" x 5"

Finished size: approximately 9" wide and 11" tall (measured from base to edge of opening) when pressed flat. A little narrower and shorter when there's an object inside it.

Materials

  • Size K Crochet Hook
  • Stitch Markers
  • 2 balls Lamb's Pride Worsted (Bulldog Blue)
  • Yarn Needle
  • Optional: Contrasting felt for stitching on the word "iDad"
  • Optional: Thread for stitching on the word "iDad"
  • Scissors

Terminology

  • ch = chain
  • sc = single crochet
  • st = stitch

Pattern

This pattern is created in continuous rounds starting at the base of the bag. The base is an oval. If you are unfamiliar with ovals, look here.

Start: Ch 27.

R1: Working in the post, not the loops that make the 'V' of the chains, sc in 2nd ch from hook. Sc next 24 ch. 3 sc in next sc. Turn to continue down opposite side of chain. Sc next 24 ch. 2 sc in last ch. Place stitch marker on loop on hook to mark the start of the next round. Move the marker at the end of each round. (54 sc made)

Crocheting in the post will give you familiar shapes when you turn to go back down the opposite side of the chain:

This image depicts what you should see along the chain when you crochet through the post. You should be left with the V's, which you will crochet when you turn to form the oval:


After the first 3 sc increase, you work back down the opposite side of the chain:

R2: Sc next 26 sc. 3 sc next sc. Sc next 26 sc. 3 sc next sc. (58 sc made)

R3: Sc next 27 sc. 3 sc next sc. Sc next 28 sc. 3 sc next sc. Sc next sc. (62 sc made)

R4: In Back Loop Only, Sc in each sc. (62 sc made)

R5 - R44: Sc in each sc. (62 sc made each round)

R45: Sc next 5 sc. Ch 1. Turn (5 sc made)

You will now work in rows, not rounds.

R46: Sc next 28 sc. Ch 1. Turn (28 sc made)

R47 - R71: Sc each sc. Ch 1. Turn (28 sc made each row)

Fasten off. Weave in all ends.

Felt it!

Felt your object by putting it in the washing machine:

  1. Select a heavy cycle with HOT water and the lowest water level available. Put your bag in the washer with some old towels or jeans and a very small amount of dish washing fluid
  2. Check on your object every 5 minutes until it has felted to the desired size. DO NOT let the washer drain or go into a rinse cycle. If you need more time, reset the time on the washer and continue agitating.
  3. Once it has achieved the proper size (approximately 11" from opening edge to bottom and 9" wide when pressed flat), take your item out of the washer and rinse it in the sink with warm water
  4. Use towels to gently remove excess water from you bag
  5. To keep its shape while drying, wrap two composition notebooks in plastic wrap (or plastic bags) and put them inside the bag. It just so happens that a composition notebook is approximately 1/2 the thickness of and iPad and the same width and height. They work very nicely in place of an iPad.
  6. Put bag somewhere to dry

Finishing

When the bag is dry, you may choose to put buttons and some extra detail on the bag. I chose to stitch on the phrase "iDad" with felt letters cut from your standard stock craft store felt. You may want to stitch on buttons. I did not put buttons on the end product though I seriously thought about putting buttons on. I'm glad I did not, however, as Dad likes to tuck the large flap inside his iPad case. It adds extra protection and what not.

If you would like to stitch on a word or something that isn't "iDad", might I suggest a few ideas:

  • "iMom"
  • "iBro"
  • "iGal"
  • "iDude"
  • The name of the individual receiving the gift
  • "iPad"
  • The Apple logo (print it out and trace it onto the felt before cutting it if you need assistance)
  • The Windows logo --- Ha ha ha!
  • A flower or motif. Check out Iconfinder if you want a source for simple, easy to trace/cut out images

Pre stitching:

Post Stitching:

And that's it! Not too difficult in my opinion.

You are encouraged to contact me if you have any questions, requests, or concerns about the written pattern. You can leave a comment here or message me on Ravelry: sarahthepark. Happy stitching!

Creative Commons License
iFelt iPad Case by Sarah Mitchell is licensed under a Creative Commons Attribution 3.0 United States License.